How to Create a WordPress Settings Page with React

While building some plugins, I figured creating dynamic applications in WordPress Admin is much easier with React components compared to using PHP and jQuery like back in the old days. However, integrating React components with WordPress Admin can be a bit challenging, especially when it comes to styling and accessibility. This led me to create Kubrick UI.

Kubrick UI is a React-based library offering pre-built, customizable components that seamlessly integrate with the WordPress admin area. It improves both visual consistency and accessibility, making it easier for you to create clean, dynamic interfaces in WordPress Admin, such as creating a Custom Settings Pages.

Before we go further, I’d assume that you’re already familiar with how WordPress plugins work. You’re also familiar with JavaScript, React, and how to install Node.js packages with NPM as we won’t dig into these fundamentals in this tutorial. Otherwise, check out our articles below to help you get up to speed.

If you’re ready, we can now get started with our tutorial on how to create our WordPress Settings page.

Project Structure

First, we are going to create and organize the files required:

.
|-- package.json
|-- settings-page.php
|-- src
    |-- index.js
    |-- App.js
    |-- styles.scss

We have the src directory containing the source files, stylesheet, and JavaScript files, which will contain the app components and the styles. We also created settings-page.php, which contains the WordPress plugin header so that we can load our code as a plugin in WordPress. Lastly, we have package.json so we can install some NPM packages.

NPM Packages

Next, we are going to install the @syntatis/kubrick package for our UI components, as well as a few other packages that it depends on and some that we need to build the page: @wordpress/api-fetch, @wordpress/dom-ready, react, and react-dom.

npm i @syntatis/kubrick @wordpress/api-fetch @wordpress/dom-ready react react-dom

And the @wordpress/scripts package as a development dependency, to allow us to compile the source files easily.

npm i @wordpress/scripts -D

Running the Scripts

Within the package.json, we add a couple of custom scripts, as follows:

{
    "scripts": {
        "build": "wp-scripts build",
        "start": "wp-scripts start"
    }
}

The build script will allow us to compile the files within the src directory into files that we will load on the Settings Page. During development, we are going to run the start script.

npm run start

After running the script, you should find the compiled files in the build directory:

.
|-- index.asset.php
|-- index.css
|-- index.js

Create the Settings Page

There are several steps we are going to do and tie together to create the Settings Page.

First, we are going to update our settings-page.php file to register our settings page in WordPress, and register the settings and the options for the page.

add_action('admin_menu', 'add_submenu');

function add_submenu() {
    add_submenu_page( 
        'options-general.php', // Parent slug.
        'Kubrick Settings',
        'Kubrick',
        'manage_options',
        'kubrick-setting',
        function () { 
            ?>
            

'string', 'sanitize_callback' => 'sanitize_text_field', 'default' => 'footer text', 'show_in_rest' => true, ] ); } add_action('admin_init', 'register_settings'); add_action('rest_api_init', 'register_settings');

Here, we are adding a submenu page under the Settings menu in WordPress Admin. We also register the settings and options for the page. The register_setting function is used to register the setting, and the show_in_rest parameter is set to true, which is important to make the setting and the option available in the WordPress /wp/v2/settings REST API.

The next thing we are going to do is enqueue the stylesheet and JavaScript files that we have compiled in the build directory. We are going to do this by adding an action hook to the admin_enqueue_scripts action.

add_action('admin_enqueue_scripts', function () {
    $assets = include plugin_dir_path(__FILE__) . 'build/index.asset.php';

    wp_enqueue_script(
        'kubrick-setting', 
        plugin_dir_url(__FILE__) . 'build/index.js',
        $assets['dependencies'], 
        $assets['version'],
        true
    );

    wp_enqueue_style(
        'kubrick-setting', 
        plugin_dir_url(__FILE__) . 'build/index.css',
        [], 
        $assets['version']
    );
});

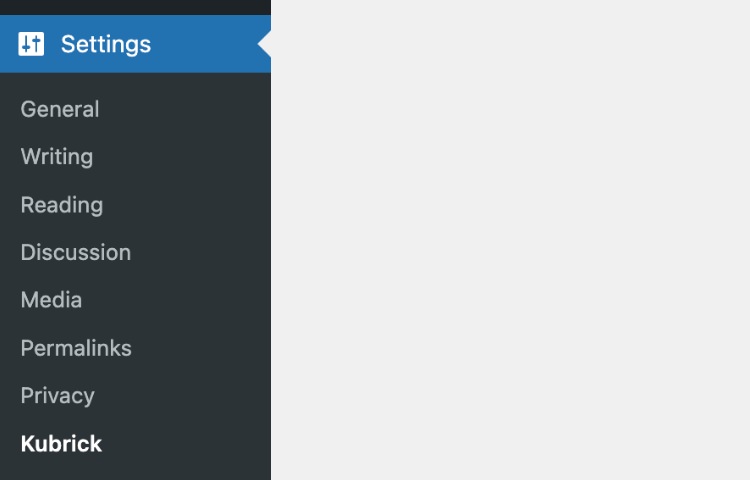
If you load WordPress Admin, you should now see the new submenu under Settings. On the page of this submenu, we render a div with the ID root where we are going to render our React application.

WordPress Settings Page with React.js

At this point, there’s nothing to see on the page just yet. We will need to create a React component and render it on the page.

Creating a React component

To create the React application, we first add the App function component in our App.js file. We also import the index.css from the @syntatis/kubrick package within this file to apply the basic styles to some of the components.

import '@syntatis/kubrick/dist/index.css';
    
export const App = () => {
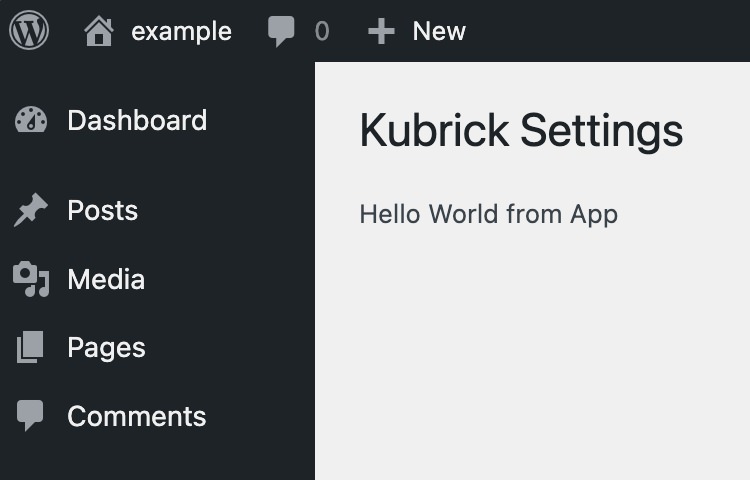
    return 

Hello World from App

; };

In the index.js, we load and render our App component with React.

import domReady from '@wordpress/dom-ready';
import { createRoot } from 'react-dom/client';
import { App } from './App';

domReady( () => {
    const container = document.querySelector( '#root' );
    if ( container ) {
        createRoot( container ).render(  );
    }
} );

Using the UI components

In this example, we’d like to add a text input on the Settings Page which will allow the user to set the text that will be displayed in the admin footer.

Kubrick UI currently offers around 18 components. To create the example mentioned, we can use the TextField component to create an input field for the “Admin Footer Text” setting, allowing users to modify the text displayed in the WordPress admin footer. The Button component is used to submit the form and save the settings. We also use the Notice component to show feedback to the user, such as when the settings are successfully saved or if an error occurs during the process. The code fetches the current settings on page load and updates them via an API call when the form is submitted.

import { useEffect, useState } from 'react';
import apiFetch from '@wordpress/api-fetch';
import { Button, TextField, Notice } from '@syntatis/kubrick';
import '@syntatis/kubrick/dist/index.css';

export const App = () => {
    const [status, setStatus] = useState(null);
    const [statusMessage, setStatusMessage] = useState(null);
    const [values, setValues] = useState();

    // Load the initial settings when the component mounts.
    useEffect(() => {
        apiFetch({ path: '/wp/v2/settings' })
            .then((data) => {
                setValues({
                    admin_footer_text: data?.admin_footer_text,
                });
            })
            .catch((error) => {
                setStatus('error');
                setStatusMessage('An error occurred. Please try to reload the page.');
                console.error(error);
            });
    }, []);

    // Handle the form submission.
    const handleSubmit = (e) => {
        e.preventDefault();
        const data = new FormData(e.target);

        apiFetch({
            path: '/wp/v2/settings',
            method: 'POST',
            data: {
                admin_footer_text: data.get('admin_footer_text'),
            },
        })
            .then((data) => {
                setStatus('success');
                setStatusMessage('Settings saved.');
                setValues(data);
            })
            .catch((error) => {
                setStatus('error');
                setStatusMessage('An error occurred. Please try again.');
                console.error(error);
            });
    };

    if (!values) {
        return;
    }

    return (
        
            {status &&  setStatus(null)}>{statusMessage}}


Conclusion

We’ve just created a simple custom settings page in WordPress using React components and the Kubrick UI library.

Our Settings Page here is not perfect, and there are still many things we could improve. For example, we could add more components to make the page more accessible or add more features to make the page more user-friendly. We could also add more error handling or add more feedback to the user when the settings are saved. Since we’re working with React, you can also make the page more interactive and visually appealing.

I hope this tutorial helps you get started with creating a custom settings page in WordPress using React components. You can find the source code for this tutorial on GitHub, and feel free to use it as a starting point for your own projects.

The post How to Create a WordPress Settings Page with React appeared first on Hongkiat.

Build A Static RSS Reader To Fight Your Inner FOMO

Build A Static RSS Reader To Fight Your Inner FOMO

Build A Static RSS Reader To Fight Your Inner FOMO

Karin Hendrikse

2024-10-07T13:00:00+00:00
2025-06-20T10:32:35+00:00

In a fast-paced industry like tech, it can be hard to deal with the fear of missing out on important news. But, as many of us know, there’s an absolutely huge amount of information coming in daily, and finding the right time and balance to keep up can be difficult, if not stressful. A classic piece of technology like an RSS feed is a delightful way of taking back ownership of our own time. In this article, we will create a static Really Simple Syndication (RSS) reader that will bring you the latest curated news only once (yes: once) a day.

We’ll obviously work with RSS technology in the process, but we’re also going to combine it with some things that maybe you haven’t tried before, including Astro (the static site framework), TypeScript (for JavaScript goodies), a package called rss-parser (for connecting things together), as well as scheduled functions and build hooks provided by Netlify (although there are other services that do this).

I chose these technologies purely because I really, really enjoy them! There may be other solutions out there that are more performant, come with more features, or are simply more comfortable to you — and in those cases, I encourage you to swap in whatever you’d like. The most important thing is getting the end result!

The Plan

Here’s how this will go. Astro generates the website. I made the intentional decision to use a static site because I want the different RSS feeds to be fetched only once during build time, and that’s something we can control each time the site is “rebuilt” and redeployed with updates. That’s where Netlify’s scheduled functions come into play, as they let us trigger rebuilds automatically at specific times. There is no need to manually check for updates and deploy them! Cron jobs can just as readily do this if you prefer a server-side solution.

During the triggered rebuild, we’ll let the rss-parser package do exactly what it says it does: parse a list of RSS feeds that are contained in an array. The package also allows us to set a filter for the fetched results so that we only get ones from the past day, week, and so on. Personally, I only render the news from the last seven days to prevent content overload. We’ll get there!

But first…

What Is RSS?

RSS is a web feed technology that you can feed into a reader or news aggregator. Because RSS is standardized, you know what to expect when it comes to the feed’s format. That means we have a ton of fun possibilities when it comes to handling the data that the feed provides. Most news websites have their own RSS feed that you can subscribe to (this is Smashing Magazine’s RSS feed: https://www.smashingmagazine.com/feed/). An RSS feed is capable of updating every time a site publishes new content, which means it can be a quick source of the latest news, but we can tailor that frequency as well.

RSS feeds are written in an Extensible Markup Language (XML) format and have specific elements that can be used within it. Instead of focusing too much on the technicalities here, I’ll give you a link to the RSS specification. Don’t worry; that page should be scannable enough for you to find the most pertinent information you need, like the kinds of elements that are supported and what they represent. For this tutorial, we’re only using the following elements: , , , , and . We’ll also let our RSS parser package do some of the work for us.

Creating The State Site

We’ll start by creating our Astro site! In your terminal run pnpm create astro@latest. You can use any package manager you want — I’m simply trying out pnpm for myself.

After running the command, Astro’s chat-based helper, Houston, walks through some setup questions to get things started.

 astro   Launch sequence initiated.

   dir   Where should we create your new project?
         ./rss-buddy

  tmpl   How would you like to start your new project?
         Include sample files

    ts   Do you plan to write TypeScript?
         Yes

   use   How strict should TypeScript be?
         Strict

  deps   Install dependencies?
         Yes

   git   Initialize a new git repository?
         Yes

I like to use Astro’s sample files so I can get started quickly, but we’re going to clean them up a bit in the process. Let’s clean up the src/pages/index.astro file by removing everything inside of the

tags. Then we’re good to go!

From there, we can spin things by running pnpm start. Your terminal will tell you which localhost address you can find your site at.

Pulling Information From RSS feeds

The src/pages/index.astro file is where we will make an array of RSS feeds we want to follow. We will be using Astro’s template syntax, so between the two code fences (—), create an array of feedSources and add some feeds. If you need inspiration, you can copy this:

const feedSources = [
  'https://www.smashingmagazine.com/feed/',
  'https://developer.mozilla.org/en-US/blog/rss.xml',
  // etc.
]

Now we’ll install the rss-parser package in our project by running pnpm install rss-parser. This package is a small library that turns the XML that we get from fetching an RSS feed into JavaScript objects. This makes it easy for us to read our RSS feeds and manipulate the data any way we want.

Once the package is installed, open the src/pages/index.astro file, and at the top, we’ll import the rss-parser and instantiate the Partner class.

import Parser from 'rss-parser';
const parser = new Parser();

We use this parser to read our RSS feeds and (surprise!) parse them to JavaScript. We’re going to be dealing with a list of promises here. Normally, I would probably use Promise.all(), but the thing is, this is supposed to be a complicated experience. If one of the feeds doesn’t work for some reason, I’d prefer to simply ignore it.

Why? Well, because Promise.all() rejects everything even if only one of its promises is rejected. That might mean that if one feed doesn’t behave the way I’d expect it to, my entire page would be blank when I grab my hot beverage to read the news in the morning. I do not want to start my day confronted by an error.

Instead, I’ll opt to use Promise.allSettled(). This method will actually let all promises complete even if one of them fails. In our case, this means any feed that errors will just be ignored, which is perfect.

Let’s add this to the src/pages/index.astro file:

interface FeedItem {
  feed?: string;
  title?: string;
  link?: string;
  date?: Date;
}

const feedItems: FeedItem[] = [];

await Promise.allSettled(
  feedSources.map(async (source) => {
    try {
      const feed = await parser.parseURL(source);
      feed.items.forEach((item) => {
        const date = item.pubDate ? new Date(item.pubDate) : undefined;
        
          feedItems.push({
            feed: feed.title,
            title: item.title,
            link: item.link,
            date,
          });
      });
    } catch (error) {
      console.error(`Error fetching feed from ${source}:`, error);
    }
  })
);

This creates an array (or more) named feedItems. For each URL in the feedSources array we created earlier, the rss-parser retrieves the items and, yes, parses them into JavaScript. Then, we return whatever data we want! We’ll keep it simple for now and only return the following:

  • The feed title,
  • The title of the feed item,
  • The link to the item,
  • And the item’s published date.

The next step is to ensure that all items are sorted by date so we’ll truly get the “latest” news. Add this small piece of code to our work:

const sortedFeedItems = feedItems.sort((a, b) => (b.date ?? new Date()).getTime() - (a.date ?? new Date()).getTime());

Oh, and… remember when I said I didn’t want this RSS reader to render anything older than seven days? Let’s tackle that right now since we’re already in this code.

We’ll make a new variable called sevenDaysAgo and assign it a date. We’ll then set that date to seven days ago and use that logic before we add a new item to our feedItems array.

This is what the src/pages/index.astro file should now look like at this point:

---
import Layout from '../layouts/Layout.astro';
import Parser from 'rss-parser';
const parser = new Parser();

const sevenDaysAgo = new Date();
sevenDaysAgo.setDate(sevenDaysAgo.getDate() - 7);

const feedSources = [
  'https://www.smashingmagazine.com/feed/',
  'https://developer.mozilla.org/en-US/blog/rss.xml',
]

interface FeedItem {
  feed?: string;
  title?: string;
  link?: string;
  date?: Date;
}

const feedItems: FeedItem[] = [];

await Promise.allSettled(
  feedSources.map(async (source) => {
    try {
      const feed = await parser.parseURL(source);
      feed.items.forEach((item) => {
        const date = item.pubDate ? new Date(item.pubDate) : undefined;
        if (date && date >= sevenDaysAgo) {
          feedItems.push({
            feed: feed.title,
            title: item.title,
            link: item.link,
            date,
          });
        }
      });
    } catch (error) {
      console.error(`Error fetching feed from ${source}:`, error);
    }
  })
);

const sortedFeedItems = feedItems.sort((a, b) => (b.date ?? new Date()).getTime() - (a.date ?? new Date()).getTime());

---


Rendering XML Data

It’s time to show our news articles on the Astro site! To keep this simple, we’ll format the items in an unordered list rather than some other fancy layout.

All we need to do is update the element in the file with the XML objects sprinkled in for a feed item’s title, URL, and publish date.


{sortedFeedItems.map(item => ( ))}

Go ahead and run pnpm start from the terminal. The page should display an unordered list of feed items. Of course, everything is styled at the moment, but luckily for you, you can make it look exactly like you want with CSS!

And remember that there are even more fields available in the XML for each item if you want to display more information. If you run the following snippet in your DevTools console, you’ll see all of the fields you have at your disposal:

feed.items.forEach(item => {}

Scheduling Daily Static Site Builds

We’re nearly done! The feeds are being fetched, and they are returning data back to us in JavaScript for use in our Astro page template. Since feeds are updated whenever new content is published, we need a way to fetch the latest items from it.

We want to avoid doing any of this manually. So, let’s set this site on Netlify to gain access to their scheduled functions that trigger a rebuild and their build hooks that do the building. Again, other services do this, and you’re welcome to roll this work with another provider — I’m just partial to Netlify since I work there. In any case, you can follow Netlify’s documentation for setting up a new site.

Once your site is hosted and live, you are ready to schedule your rebuilds. A build hook gives you a URL to use to trigger the new build, looking something like this:

https://api.netlify.com/build_hooks/your-build-hook-id

Let’s trigger builds every day at midnight. We’ll use Netlify’s scheduled functions. That’s really why I’m using Netlify to host this in the first place. Having them at the ready via the host greatly simplifies things since there’s no server work or complicated configurations to get this going. Set it and forget it!

We’ll install @netlify/functions (instructions) to the project and then create the following file in the project’s root directory: netlify/functions/deploy.ts.

This is what we want to add to that file:

// netlify/functions/deploy.ts

import type { Config } from '@netlify/functions';

const BUILD_HOOK =
  'https://api.netlify.com/build_hooks/your-build-hook-id'; // replace me!

export default async (req: Request) => {
  await fetch(BUILD_HOOK, {
    method: 'POST',
  })
};

export const config: Config = {
  schedule: '0 0 * * *',
};

If you commit your code and push it, your site should re-deploy automatically. From that point on, it follows a schedule that rebuilds the site every day at midnight, ready for you to take your morning brew and catch up on everything that you think is important.

Smashing Editorial
(gg, yk)